Pages

Showing posts with label kitchen. Show all posts

Sunday, 8 January 2012

Kitchen worktop

So back to the kitchen. We had decided on oak worktops, I wanted the warmth of them against the cool of the cabinetry and to give a feel of a country kitchen without going over the top. I sourced them here and the service and quality were excellent. We went for the square edge, chunky ones at 40mm thick. My only concern was whether I would be able to lift them. I was OK with the 3 metre length but came unstuck with the 4 metre. Fortunately 500mm needed to be trimmed off and I managed to wrestle it into the kitchen.
Waiting to be cut
We used (I'm using the royal we here, in fact it was Andrew) the cardboard sheets protecting the wood to template the spaces, which worked well.

Templating  
Because the worktop has a square edge, not a bull nose finish, Andrew didn't need to worry about fancy angled joints but he did get to use his router for the joining bolt cut-outs.

Neat job Andrew
Some people worry that wooden worktops are difficult to maintain and damage easily, but if you treat them right they're great. The first few days you need to keep coating with worktop oil and treat the surface gently for the first couple ofweeks until the oil has hardened properly. We got six coats on as quickly as we could and have added another couple since, and will probably add a new coat every two months or so. When we put liquid on the surface it just sits there as a little droplet and doesn't penetrate. If after a few years the wood starts to look tired then you can just sand it back and start again.

Getting the worktop in meant two important things:

1. After eight months I got a hob - and the first thing on the menu was a risotto

2. No more washing up in the bathroom basin - and I get to fit my wonderful sink

Franke sink (piping to be boxed in at some stage)
Now I appreciate that it's not everyone's cup of tea but I love it. Designed by Porsche and manufactured by Franke it's big enough to take my largest baking trays with room to spare. And added to it's appeal is the fact that I only paid £5 for it. When I worked in a kitchen showroom two or three years ago we had a refit and the display kitchens were sold off. Nobody took the sink so I donated £5 to the company's approved charity and it was mine. At that point I had no idea where I was going to use it but I had to have it. The sink we found at Screwfix and chose it as it echoed the square design of the sink.

We need a trip to Ikea to buy a couple of bits to finish off the kitchen  - we made a couple of last minute design changes - and then the biggest job is the wall tiling.  So hopefully I'll soon be able to show you some pretty photographs.


Until next time


Sharon


Sunday, 18 December 2011

Kitchen part one - Barista bar

With Christmas fast approaching we've at last started to assemble the kitchen. After much planning and looking we decided on the Ikea Applad. I wanted a simple style that was pale but not high gloss. The Applad is soft white with a silky finish, easy to keep clean but adaptable in style. I was looking for Swedish simplicity but with a hint of Mediterranean warmth. Or as Andrew says Abba meets Pavarotti.
Courtesy of Ikea

Used to designing kitchens on a CAD system I did find the Ikea on-line planner a little clumsy but once we went into our nearest store found them very helpful. We ordered it back in June and it's been in the garage since the end of July.

Where do I start?
Our starting point was the short wall with the boiler. I wanted to have a separate area for making tea & coffee - my personal barista bar - and this also developed into a wine area.  When friends visit they can make drinks without needing to get near the food preparation area. In hindsight this was probably the most difficult area to start with as we had uneven walls and tall units.

Ready to start

Because I have a thing about symmetry we used an integrated fridge freezer housing to cover the boiler to match the real thing at the other end. We had to cut an end panel to make a filler between the carcass and the wall, partly to pull the cupboard out to give access to the boiler for servicing but also as the wall is very uneven and this allowed us to start with a vertical.

First carcass
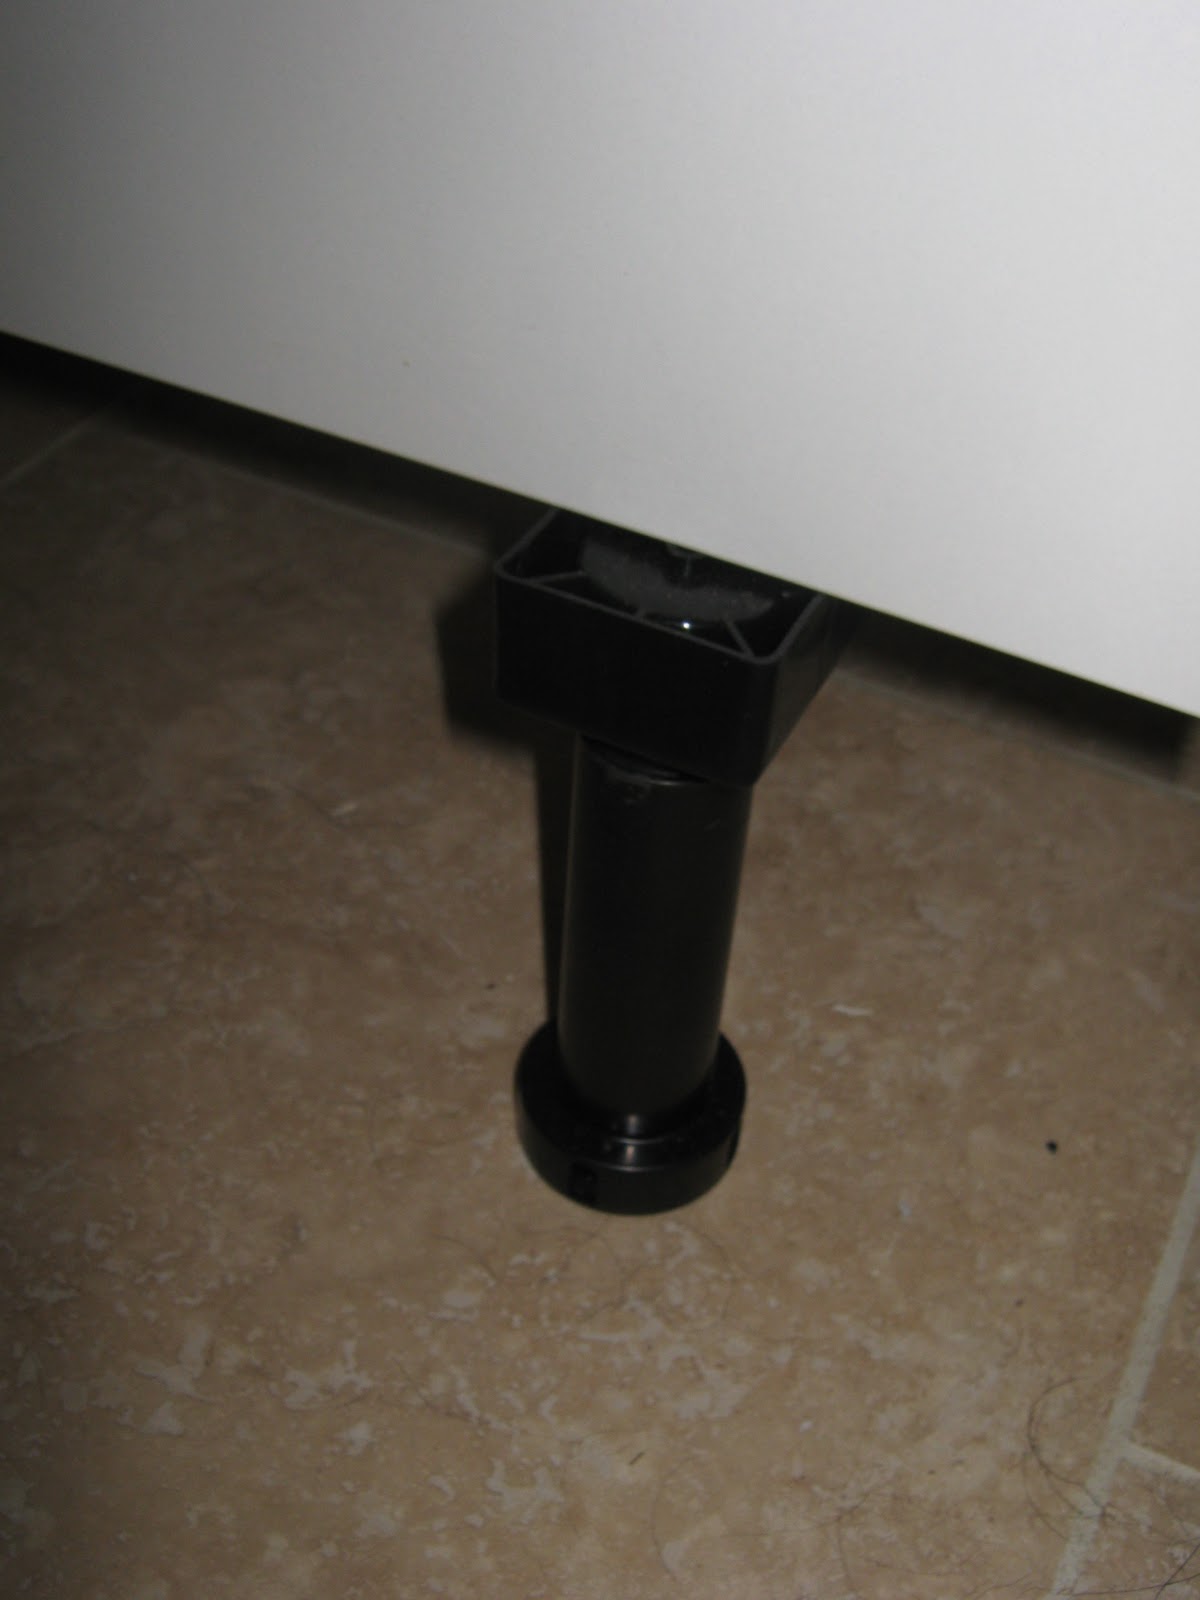
Despite tales of horror we* found assembling the units quite easy, but only if you follow the instuctions very carefully. What may seem an odd thing to do will have a reason and also, as there are no written instructions, examine the drawings carefully. The only thing we did do, after the first unit went up, was to screw the legs on. These seem insubstantial but work well once the weight of the cabinet holds them in place. The difficulty is keeping them on while manouevring  the unit in place, if they are not screwed in place they fall off at the most inconvenient times.

Screwing on the legs
Joining leg
First carcass
Next was a 600mm base unit, with a gap for a wine cooler, and then the integrated fridge freezer.  The base unit has a drawer for cutlery and bottle openers and a cupboard with two pull out wire shelves. One will house all the mugs and the other tea and coffee.
The Applad kitchen comes in two heights and we chose the taller one as we have the headroom and you can never have enough storage in a kitchen. The wall unit here however is a shorter one as we are going to put a shelf underneath for some of the coffee making equipment.

Progress

All up
At last, after nearly eight months, I have a fridge :-)  Next stop an oven.


Until next time


Sharon

* when I say we what I mean is I read the instructions and passed the screws while Andrew did all the difficult stuff.


Thursday, 1 December 2011

Kitchen floor

We had decided on traventine tiles for the kitchen and hall, I like that they are light but warm in colour. The fact that they are a natural product gives them a great texture and adds interest to a large space without being busy.
Because they were going to extend into the hall we decided on a brick bond pattern, this visually extends the width and is more forgiving of uneven walls. It took a couple of hours for Andrew to plan - the pattern had to line up with three openings in the kitchen and the front door.

The tiles we bought were filled, honed and polished on the front but the backs are very holey.
Reverse of tile
Because of this the reverse of the tiles have to be 'buttered' before laying on the bed of adhesive. This makes sure that all the holes are filled and there will be no voids.


Buttering


First tile down


Coming along

The only issue we had was the drying time of the adhesive which meant we could not walk on them for 16 hours. Andrew did well on planning exit routes for us. One day I came home to this....
Walking instructions

On day three Mortimer & myself got marooned in the office/kitchen/workshop as the hall floor was being tiled outside our door. Fortunately I had the computer, kettle, dog biscuits and two chairs to upholster so all was well.
After all the tiles had been laid and grouted we spent along time on hands and knees cleaning all the limestone dust off before applying two coats of sealer. We made  sure that it was well absorbed into the grout so that we won't have any problems with grubby tiles or grout lines.
Marooned
Spreading adhesive
Finished kitchen floor
Hall to kitchen
So at last we're ready for the big kitchen fit.


Until next time.
Sharon


Saturday, 19 November 2011

Kitchen progress

With the sitting room done, bar all the curtains and dressing, we've moved on to the kitchen. This is a major project and the first with a deadline - Christmas. Actually the weekend before as we have Andrew's brother and his wife to stay and it will be the first time they've seen the house.

I have to confess I'm getting desperate to cook properly. For me it's a way of relaxing which I can't do with just a microwave and a portable halogen oven (brilliant though that is). We can produce edible fuel but not much to dress the table and light the candles for.

While the kitchen was still intact Andrew installed new lighting and channelled out the walls for the sockets. The original lights were two striplights which, bizarrely, had been plastered up to so a lot of filling had to be done to smooth the ceiling.

Filling & lighting
More holes, more filling
Wall cupboards gone
We wanted to get the painting done before the floor went down, it just makes life easier. First we removed some of the old units, keeping the sink.  Andrew moved his desk upstairs so we could set up a kitchenette in the office.

Office kitchenette
Ceiling painted, we marked out where all the cupboards were going and set to with the paint. I wanted quite a strong colour and eventually chose Oak Fern, a Kevin McCloud colour by Fired Earth. I love these paints as they have a great texture, complex colours and change with the light.
First coat

Just the sink left

More holes, more filling

Next on the list is tiling the floor so

Until next time


Sharon


Thursday, 7 July 2011

About the house

The house is a bit like an ageing super model - the bones are good but it doesn't do to look to closely! The previous owners had lived here for 28 years and although left it immaculate and newly decorated there's a lot of work to be done. The house was originally  four room square, two rooms at the front & two at the back. A hall & staircase in the middle with a small bathroom between the two back bedrooms. Alterations have been made in the past which include a front & a back reception room being knocked into one with a very 70's arch. Upstairs the bathroom has been moved into one of the bedrooms and the original knocked into a bedroom. Sadly not a full en-suite just a lonely basin at one end of the room.

 So today I'll take you through the downstairs.

Now when we bought the house the hall, sitting room and dining room ( now the office) were carpeted. We'd owned the house for 36 hours when these all came up so that the new damp proof course could be injected. And because we didn't want to get too cosy they didn't go back down except in the office.

Original tiles & missing border


Under the hall carpet was the original tiled floor but it's all a little strange. The pattern includes a border but not all the way round, it disappears into the under stairs cupboard, but we can't see any evidence that the stairs have been moved. At the bottom of the stairs there is a very unattractive internal window which was once the doorway to the front parlour. This will have to go. The front door is fairly new, double glazed and nice & secure. Unfortunately it opens the wrong way, if you want to open it and let someone in, you have to reverse up the stairs!

Internal window as seen from sitting room

We have wall lights to match!

Didn't take us long - day 2


So wrong! Artex ceiling & mean skirting boards
 The sitting room floor is solid concrete and so we sealed it to stop the dust and installed some furniture to have somewhere to sit. The house is single brick so one of our first jobs is to add insulation to the walls. There are only two radiators in this space, which is approximately 7.5m x 4m, and an electric fire. So plans are to increase & improve the radiators and put in a wood burning stove.


The office will also need insulation, something doing with the open fire and updating the radiator. The problem with this room is that we both have to work here and so there will be huge disruption when work starts.

Office fireplace

Next, at the back of the house is the kitchen diner. Originally there was a pantry here but this was removed to give more space. It's a reasonable size and currently has fitted cupboards. But. Big but. The cupboards are dark and falling apart, the new work surface (put on to help the sale no doubt) is a wood effect laminate which doesn't look good at all &  the floor is dark. I have no oven, no hob, no fridge but a freezer and a very nasty smell from under the sink! So we went out and bought a cheap microwave but I think the next few weeks are going to be hard for a couple who love to cook.


Dark

Missing oven

Shiny new microwave

Now the last 'room' we have great plans for! This is the lobby that links the kitchen with the original outhouse, now a loo and a small utility space. Henceforth this is to be known as 'The Orangery', not at all pretentious!

Loo & utility

The Orangery!

Hate that brown paint!
I can dream! Source: Art et Deco

Next time I'll show you upstairs.


Sharon